Blood Knot
The blood knot is one of the most common knots for joining two pieces of monofilament together when tying leaders or attaching tippet. It forms a clean, even in-line knot that slides easily through line guides. It is best used for joining materials of roughly similar diameter. The knot can usually be easily tightened when there is a difference of .003" diameter between the two materials. If joining material of widely different diameters try doubling the lighter of the two.
With thicker materials or with a larger difference in diameter you may want to try using different numbers of wraps in the different pieces. The normal number of wraps is 5. You will need to go to 4 or even 3 wraps in very heavy materials. When there is a relatively large difference in diameter (for example 20# to 30#) it can be helpful to use 5 wraps in the thinner material and 4 in the thicker. When joining materials of different diameter it is easier to wrap the thicker material before the thinner.
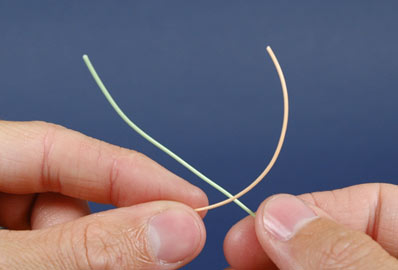
1: Lay the two pieces together with an overlap of a few inches where they will be joined and pinch the place where they overlap between your thumb and finger.
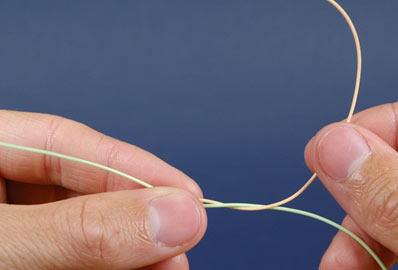
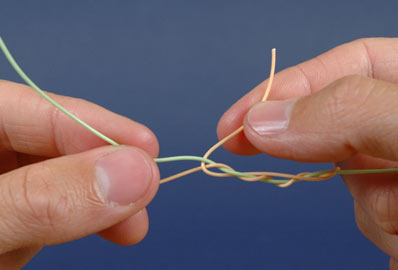
2 - 5: Wrap the tag end of the heavier material around the standing line 5 times and pass it through the loop formed in the middle.
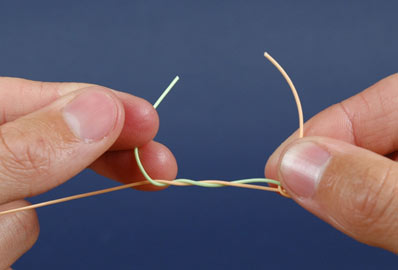
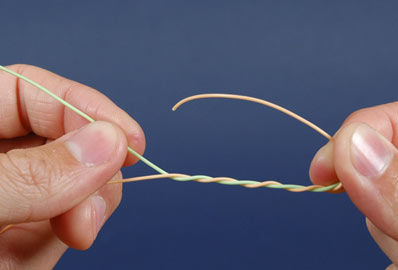
6 - 7: Make 5 wraps in the opposite directions with the thinner material and pass the tag end through the loop in the middle in the opposite direction.
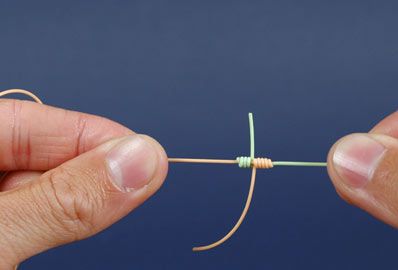
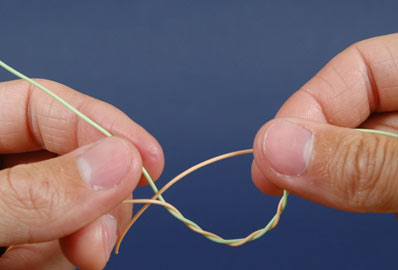
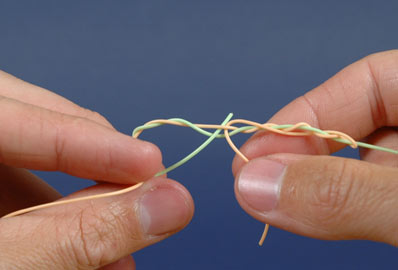
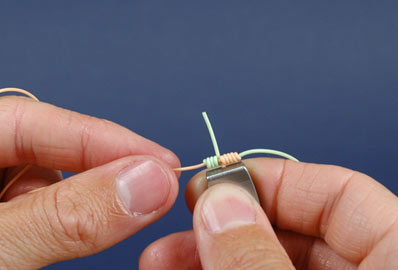
8: Moisten the knot and begin to draw it tight.
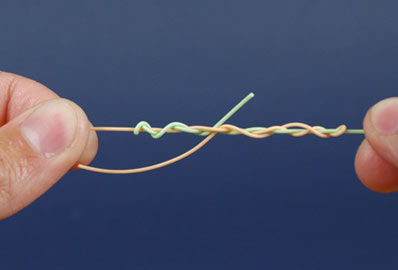
9: Once the knot is partially tightened and the wraps are coming together evenly pull firmly on both ends to seat the knot.
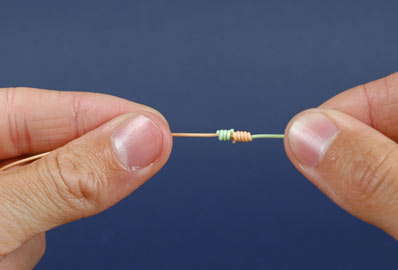
10: Trim the knot leaving short tag ends.
11: The finished knot.
Our brands