Non-Slip Mono Loop
The non-slip mono loop is an excellent all-around knot for attaching your fly to your leader. It is a very strong knot, is easy to tie, and works in a huge range of material diameters. The open loop attachment allows your fly to have more action than possible with a tight-to-the-eye connection.
How Many Wraps?
The non-slip mono loop is one of those rare knots that works very well in practically any diameter. The number of wraps necessary in different size materials does, however, vary. With lines heavier than 60# use two turns (or 3 if you can get the knot to seat firmly). For 50# to 60# use 3 turns. For 15# to 40# line use 4 turns. For 8# to 12# line use 5 turns. With 3x or lighter material you will want to make 7 wraps. 5x and lighter requires 8 wraps. With heavier materials you may need to give the tag end a good pull after the knot is tightened to make sure it is fully seated.
Loop Size
The size of the loop can be adjusted in several ways. A small overhand knot will give you a smaller end loop. Also the closer the overhand knot is to the hook eye the smaller the loop will be. Tightening the knot most of the way by pulling on the tag end will further help you to maintain a small loop.
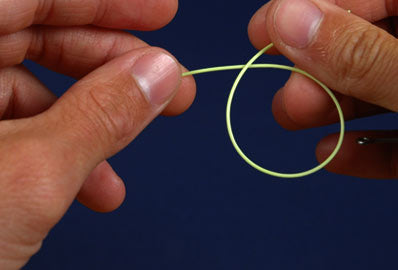
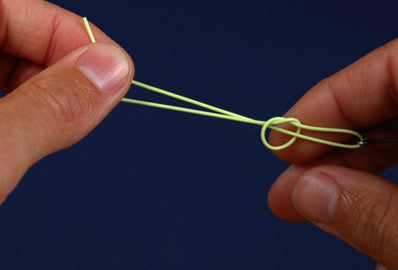
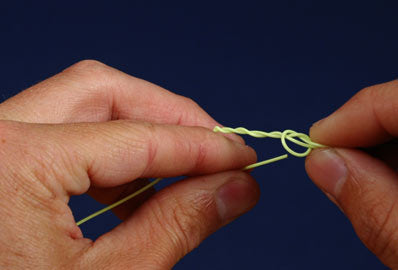
1 - 2: Tie an overhand knot in the line. Tighten the knot down so it is relatively small but not tight. The tag end should be a few inches long.
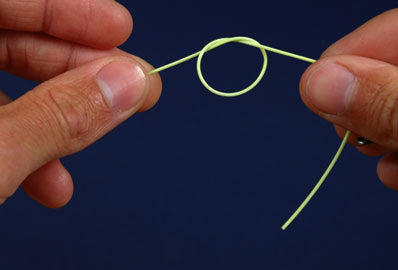
3: Pass the tag end through the eye of the hook.
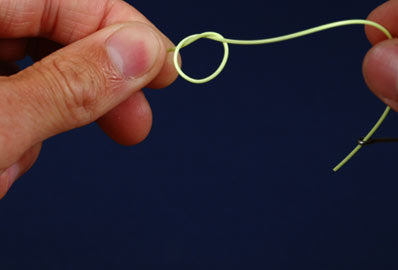
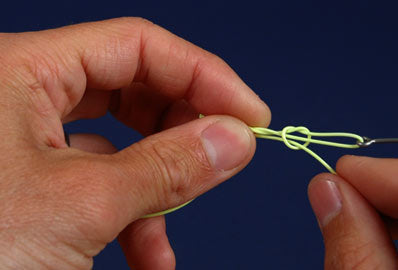
4: Pass the tag end through the bottom of the overhand knot the same way the line that goes around the hook comes out.
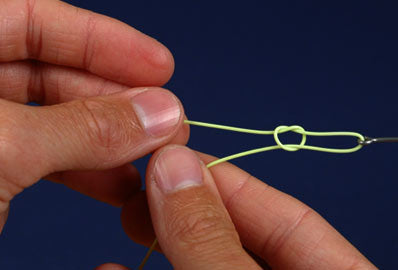
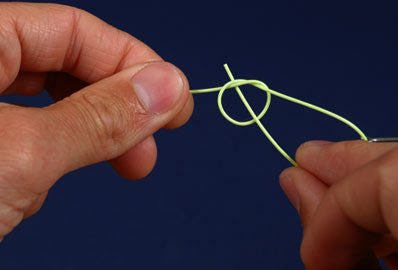
5 - 6: Adjust the loop around the hook eye to a little smaller than you want the final loop to be.
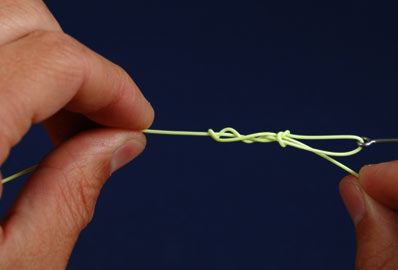
7 - 8: Wrap the tag end around the standing line in the direction opposite the direction in which you tied your overhand knot (if you are right handed you probably tied your overhand knot by wrapping up and over away from your body. If so these wraps should go under and away from you and come back over the standing end as they come back towards you). See below for the recommended number of turns.
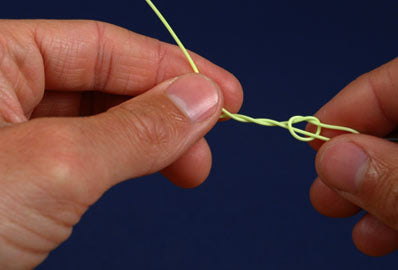
9 - 10: Pass the tag end back through the overhand knot following the path of the other pieces of mono that pass through the loop.

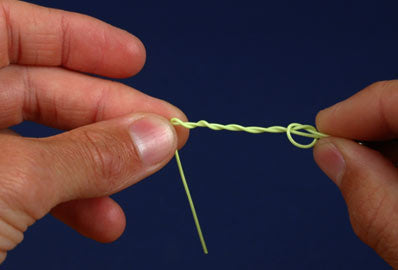
11 - 12: Moisten the knot and pull gently on the tag end to start to tighten the knot. When the wraps get close together but not completely tight grasp the standing end in one hand and the fly in the other and with a steady pull seat the knot to finish it.

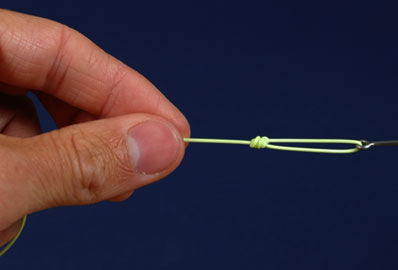
13: Trim the tag ends close to the knot.
14: The finished knot.
Our brands